
Best Tire Deflator for 4x4 Trucks: A Buyer's Guide

Last Updated: November 1, 2026
Quick Summary
The best tire deflator for 4x4 trucks is an automatic screw-on style with a 10 to 30 PSI adjustable range, plus-or-minus 2 PSI accuracy, tool-free adjustment, and a brass body. The Auto-Stop Tire Deflators set from OverlandRetail.com costs $49.78 for four and stops each tire at your set pressure.
- Automatic deflators screw onto each valve stem and stop themselves at your set pressure.
- A 10 to 30 PSI range covers sand, rock, mud, gravel, and hardpack starting pressures.
- Add about 2 PSI to your terrain starting point for every substantial load increase.
- Reinflate to the door-jamb placard pressure before exceeding roughly 50 mph on pavement.
- The Auto-Stop kit includes four valves, a zipper pouch, and a 2-year warranty.
Table of Contents
- Why the Right Tire Deflator Changes Your Off-Road Day
- Automatic vs Manual Tire Deflators: Which Style Fits Your Truck?
- Key Features to Compare Before You Buy a Tire Deflator
- How to Use Tire Deflators: A Step-by-Step Air-Down Routine
- Off-Road Tire Pressure Guide: Matching PSI to Terrain and Load
- Do Screw-In Tire Plugs Work for Trail Repairs?
- Field-Proven Pick: Auto-Stop Tire Deflators from OverlandRetail.com
- Get Your Air-Down Kit Ready for the Next Trail
- Frequently Asked Questions
Why the Right Tire Deflator Changes Your Off-Road Day
A tire deflator is a small brass or aluminum valve that screws onto your tire's valve stem and releases air until a set pressure is reached.
Here is the part most guides get wrong: airing down is not about looking serious in the trailhead parking lot. It is about footprint.
Below, we break down how automatic and manual deflators differ, which specs actually matter, and how to match pressure to terrain and load.
Automatic vs Manual Tire Deflators: Which Style Fits Your Truck?
Automatic deflators can be a convenient choice for many 4x4 trucks. You set a target PSI once, screw one onto each valve stem, and walk away while each unit stops itself at the set pressure. Manual deflators, by contrast, require you to hold a gauge and bleed air tire by tire, checking repeatedly.
The trade-offs are real. Manual gauges are cheap, simple, and give you total control, but they demand your attention four times over.
Key Features to Compare Before You Buy a Tire Deflator
Five specs separate a good deflator from a frustrating one. Compare these before you spend:
- Adjustable pressure range: Look for a range that covers your terrain needs, typically 10 to 30 PSI for most trail use.
- Accuracy tolerance: A plus-or-minus 2 PSI tolerance is generally acceptable for trail work. This is not precision vehicle tuning.
- Tool-free adjustment: You want to change settings with your hands, not by hunting for an Allen key in the dirt.
Watch out: buying a set without a clear pressure scale means you are guessing at your target. A visible scale lets you confirm the setting before you commit.
How to Use Tire Deflators: A Step-by-Step Air-Down Routine
The routine below works with any screw-on deflator and takes about five minutes for all four tires once you have done it twice.
- Park on level ground and set the parking brake. Check your current tire pressure with a gauge before anything else.
- Decide your target pressure based on terrain and load, then adjust each deflator to that setting using its scale.
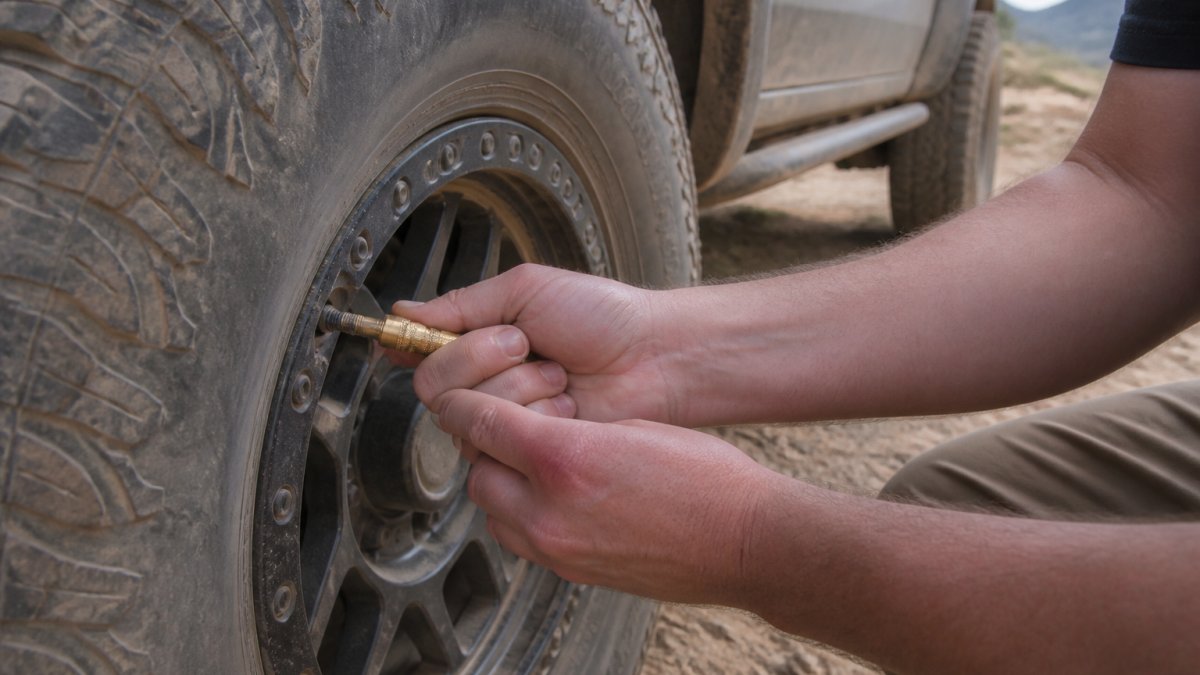
- Remove one valve cap at a time and screw a deflator onto each stem. Thread it on firmly but do not overtighten.
- Let the deflators work. Automatic units stop at the set pressure; manual units require you to monitor and close the valve.
- Remove each deflator, check the pressure with a gauge, and replace the valve caps.
- Confirm all four tires read within a couple of PSI of each other before you roll out.
Expected result: four tires at your target pressure, evenly matched, in a few minutes.
Off-Road Tire Pressure Guide: Matching PSI to Terrain and Load
What you actually need is a starting pressure you can dial into the tool, plus the load and tire variables that move that number up or down. Use the ranges below as starting points, then verify with a gauge and adjust in 2 PSI steps.
Starting pressures by terrain
| Terrain | Typical starting range (light truck, stock tire) | What it buys you | Main risk if you go too low |
|---|---|---|---|
| Loose sand / dunes | 12-18 PSI | Larger footprint, flotation, less digging | Bead unseating on hard turns or side loads |
| Rock / sharp shale | 15-20 PSI | Sidewall flex and rim protection without pinching | Pinch flats and sidewall cuts if you drop too far |
| Mud | 15-20 PSI | Tread cleaning and a wider contact patch | Burying the axle if pressure is too high and tread packs |
| Gravel / washboard | 20-25 PSI | Softer ride, less washboard chatter | Minimal, this is a comfort and traction range |
| Hardpack / fire roads | 25-30 PSI | Near-street traction with some compliance | Little benefit below this; save the wear |
These ranges assume a half-ton or midsize 4x4 on a stock-size all-terrain tire. They are not universal. The three variables below move them.
Variable 1: Tire size and construction
A taller, wider tire has more air volume and a longer sidewall, so it tolerates lower pressure before the rim gets close to the ground. A plus-size 35-inch tire on a light truck can often run the low end of the sand range; a stock 31-inch tire on the same truck should stay 2-3 PSI higher to protect the rim.
Variable 2: Vehicle weight and payload
This is the variable most guides ignore, and it is the one that matters most for a loaded 4x4 truck. A fully built overland rig with a rooftop tent, fridge, bumper, winch, and two occupants can add several hundred pounds over curb weight. That weight presses the sidewall closer to the rim. As a rule of thumb, add about 2 PSI to your terrain starting point for every substantial load increase, a full bed, a heavy bumper-and-winch combo, or a trailer tongue.
Variable 3: Wheel width and bead type
A wide wheel relative to tire width holds a bead better at low pressure. A narrow wheel with a wide tire is more prone to peeling the bead in sand or during a hard side-load. If you run a wide-tire/narrow-wheel combo, stay at the top of the terrain range and consider bead-lock wheels before you chase the lowest possible PSI.
Auto-Stop Tire Deflators, Adjustable 10-30 PSI (Set of 4) →
How to find your number without guessing
- Start at the top of the range for your terrain.
- Air down, then drive a short loop and inspect the contact patch, chalk or dust on the tread tells you how much rubber is actually touching.
- Drop 2 PSI at a time until traction improves but the sidewall still has clearance at the rim.
- Record the pressure, terrain, load, and tire size in a log. After a few trips you will have a personal table that beats any generic chart, because it reflects your truck's actual weight and tire build.
A deflator with a 10-30 PSI adjustable range covers every row in the table above, which is why that range is the practical sweet spot for 4x4 truck use.
Do Screw-In Tire Plugs Work for Trail Repairs?
They seat into the tread and seal small holes from nails, screws, and thorns quickly, without removing the tire from the wheel.
The limits matter. Sidewall damage is not a plug job, and a plug is a temporary repair, not a permanent fix. Get the tire properly inspected and repaired once you are back on pavement.
If you want the broader picture on recovery gear and trail safety, our guide on offroad recovery gear safety tips for 4x4 drivers covers the essentials before you rely on plugs and deflators in the field.
Field-Proven Pick: Auto-Stop Tire Deflators from OverlandRetail.com
The Auto-Stop Tire Deflators set from OverlandRetail.com, priced at $49.78 for a set of four, is designed for off-road and 4x4 use.

The setup is tool-free. A clear scale display lets you twist the shell to your target pressure without hunting for tools.
The kit includes four deflator valves and a zipper pouch, and it is backed by a 2-year warranty with lifetime customer support. It suits off-road trucks, SUVs, RVs, UTVs, and powersports rigs. It is built for quick trail air-down, not precision vehicle tuning.
Best for: drivers who want to air down all four tires and get moving. Skip if: you only air down occasionally and prefer a single manual gauge.
Get Your Air-Down Kit Ready for the Next Trail
A deflator solves half the workflow. The other half is getting air back in and getting home safely, and that means matching a compressor to your tire volume and building a repeatable reinflation routine.
Size the compressor to your tire volume
Compressor output is rated in cubic feet per minute (CFM) at a given pressure, and tire volume scales with diameter and width. A rough planning guide for refilling four tires from about 15 PSI back to 35 PSI:
- Compact 1-2 CFM units: fine for stock 31-33 inch tires on a light SUV; expect several minutes per tire and a duty cycle that forces cool-down breaks.
- Mid-range 2.5-4 CFM units: the practical floor for a 4x4 truck on 33-35 inch tires; refills all four in a reasonable window without constant cooldown.
- High-output 5+ CFM units (often dual-cylinder or engine-driven): the right call for 37-inch-plus tires, heavy loads, or group trips where you are airing up several rigs.
Check the duty cycle rating. A compressor rated for 50% duty at 100 PSI will overheat if you run it continuously through four large tires; plan cool-down intervals or buy more CFM than you think you need.
The complete air-down and reinflation workflow
- Before the trail: check cold pressure at the placard, confirm your deflator setting against your pressure log, and test the compressor at home so you are not diagnosing a dead unit at the trailhead.
- Air down: screw on the deflators, let them stop at the set pressure, remove them, and verify each tire with a gauge. Confirm all four are within about 2 PSI of each other.
- On the trail: check pressures after hard sections, especially in sand or rock, and look for sidewall damage or bead seating.
- Before pavement: reinflate to the door-jamb placard pressure, not to your off-road number. Recheck with a gauge after the compressor shuts off, because pressure rises as tires heat.
- After the trip: clean and dry the deflators, check calibration against a known gauge, and store them with the caps on to keep dirt out of the valve.
Build your kit in this order
- A matched set of deflators with a visible scale and a 10-30 PSI range.
- A quality tire gauge to verify results, do not trust the deflator's setting alone.
- A compressor sized to your tire volume, with a hose long enough to reach all four corners.
- Spare valve caps and a pouch so the set stays together.
- Screw-in tire plugs for tread punctures, plus a proper recovery kit for the days when pressure alone will not save you.
For a fuller list to round out your setup, our essential 4x4 vehicle recovery tools guide covers what belongs in the truck before your next trip.
Frequently Asked Questions
Are automatic tire deflators worth it?
Automatic tire deflators save time and keep all four tires consistent. Set your target PSI once, screw one onto each valve stem, and each unit stops on its own. For drivers who air down regularly, the convenience and repeatability are worth the cost. Manual gauges work but require you to watch and stop each tire yourself.
How low should I air down my tires for off-roading?
It depends on terrain and load. A common starting point for sand and loose rock is 15-20 PSI on a loaded 4x4 truck, while mild trails may only need 25-30 PSI. Heavier trucks and larger tires often need slightly higher pressures to avoid sidewall damage. Always check your tire manufacturer's minimum recommended pressure and test in a safe area before relying on a setting on the trail.
Do I need a tire deflator with a built-in pressure gauge?
A built-in gauge helps you confirm the target pressure without carrying a separate tire gauge. Many automatic deflators rely on a pre-set dial and stop at the set PSI, so a separate gauge is still useful for spot checks. If you prefer manual control, a deflator with an integrated gauge lets you watch pressure drop in real time and stop exactly where you want.
Can tire deflators damage my valve stems?
Quality deflators that screw onto the valve stem are designed to avoid damage when installed and removed correctly. The risk comes from cross-threading, overtightening, or using a deflator that removes the valve core and leaves the stem exposed to dirt. Clean the valve stem before attaching, thread it on by hand, and avoid forcing it. Inspect valve cores and caps regularly, especially after dusty trips.
